Welcome to Seduced by Produce

I get pleasure out of experimenting in my kitchen with food. I am helpless against the siren song of beautiful fruits, vegetables and herbs. I love going to local farms and farmer's markets, taking home my purchases, and then trying to figure out healthy and delicious ways to cook it all. That doesn't mean that I don't make unhealthy foods, but when I do, I try to make them worth the calories and time. I don't cook every day, but when I do, I want it to be delicious.

Sunday, January 23, 2011

Swiss Chard Spanikopita Casserole

Happy National Pie Day!!!

For those of you who don't know, January 23rd is National Pie Day which is not to be confused with National Pi Day on March 14th.  I've always wanted to cook something for this auspicious day, but was always a "day late or a dollar short" around this time of year.  This year, I was ready!  Ok, I'm really eating leftover take out pizza - the results from last night's allergy attack which totally counts but I finally made something in honor of this special day. Swiss Chard Spanikopita Casserole.


I made this as part of my nod to Tu B'Shevat. Tu B'Shevat is Hebrew for the 15th of the month of Shevat and is the Jewish New Year for the Trees.  It is one of the few Jewish holidays without a strong food tradition.  For me, it's a time of year to reflect on my role in nature and to revel in the beauty of the natural world.  Some people eat of the seven species mentioned in the Torah, of which one is wheat.  I decided that eating locally and in season is my way of celebrating Tu B'Shevat this year. 

Before I left for my work conference this week, I wanted to use up the swiss chard that I had picked up from Hydro Harvest Farms last week.  I had a recipe in mind, a riff on spanikopita that I found from Cooking Light's website called Swiss Chard Spanikopita Casserole.  For those of you that don't know, Spanikopita is Greek for "spinach pie" and is typically a combination of spinach and cheese baked between phyllo sheets and is a caloric nightmare thinly disguised by the greens held inside.  This recipe cuts the majority of the calories out since it uses cooking spray in between each phyllo layer instead of oil or butter.  I was a bit skeptical, but I love Spanikopita in all its caloric wonder and am determined to find a way to enjoy it without guilt.  I think I found it and now I am get to share it with you!

First, let me be honest and say that I did not make the phyllo and instead purchased it in the frozen section at my local Publix.  I followed the directions on the box for defrosting.  Then I did my mise en place which included washing, de-stemming and ribboning the swiss chard, chopping the chives, onions, garlic and herbs.  I planned on making the filling the day before I made the dish.

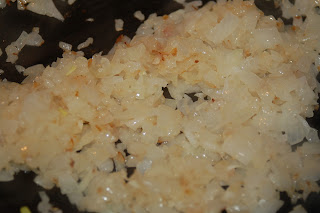
In my house growing up, if it didn't start with an onion, it must have been dessert.


Mince three small yellow onions and six to eight cloves of garlic.  Pour about 2 tablespoons of a neutral flavored oil on medium high heat in the largest saute pan you have - you'll need the room for all of your greens later on. 
 Saute the onions until they are translucent and then add the garlic. 

About a minute later, add the swiss chard and cook until the volume is reduced by half. If all of the swiss chard doesn't fit, add it as the greens wilt and room in the pot opens up.  Salt the pan with a pinch of salt.


When the swiss chard is wilted, add the chives, mint and parsley and cook for one minute.
When the whole kit and kaboodle is nicely wilted, take the pan off the heat and place in a large mixing bowl to cool.

When the greens mixture has cooled to touch, add the egg whites, feta, parmesan, salt and pepper to the mixing bowl and combine. 

At this point, I put the mixture in the fridge in a covered bowl until I was ready to make the casserole. 
I used Rainbow Swiss Chard and the red stems colored the liquid so it took on a reddish hue.  If I didn't know any better, I would have sworn some beets had made it in somehow!

When I was ready to make the casserole, I preheated the oven to 350 degrees and took the mixture out of the fridge and the defrosted phyllo dough sheets.  I took out my favorite casserole dish, a 9 by 13 inch Pyrex glass dish with a rubberized lid and sprayed it with cooking spray and began layering phyllo sheets and cooking spray.  I layered 8 sheets before spreading the greens and cheese mixture on top and repeating the phyllo sheets and cooking spray.

Prior to placing the casserole in the oven, cut the casserole into 12 sections.  This is an important step that should not be skipped.  If you skip this, and try to cut the phyllo after you bake it, the phyllo will shatter.
Bake the casserole for 40 minutes or until the phyllo is tanned and crispy.  You will need to let this cool off before you eat this or you will get the dreaded roof of the mouth burns.  You won't want to because the aromas coming off this casserole is dangerously and overwhelmingly enticing, but please don't get hurt over it.  It is just not worth the pain.  No food is worth pain.  Ok, maybe this is, but it's on you!

Ingredients:
2 tablespoons neutral flavored oil

3 small yellow onions, minced
3/4  cup  minced chives
6 - 8 garlic cloves, minced
9  cups chopped and de-stemmed Swiss chard (about 1 1/2 pounds)
6  tablespoons  chopped fresh parsley
3  tablespoons  minced fresh mint
1  cup  (4 ounces) crumbled feta cheese, or half a normal block of feta - what is up with that?
1/2  cup  (2 ounces) freshly grated Parmesan cheese
Salt and Freshly Crashed Black Pepper to taste
3  large egg whites
Cooking spray
10 sheets frozen phyllo dough, thawed

Tuesday, January 18, 2011

Overnight Pumpkin and Ginger Cinnamon Buns

I have a deep, dark, obsession with all things doughy, buttery, sugary and baked.  I'm Seduced by Produce, but I have a sinister and more floury side.  If you were a fan of Saturday Morning Cartoons, just imagine the following: Good angel = green leafy stuff, bad angel = baked, buttery deliciousness.  There, I said it!  Wow, that was freeing!

Ok, now that I got that off my chest, I get to share with you the most recent product of my obsession. I found a recipe on King Arthur Flour's website for Cinnamon-Swirl Pumpkin Rolls last year and it was so good last year that I just had to make it again!  I'm the only one in the house who likes pumpkin and ginger, but I had family coming in this weekend which gave me the opportunity to enjoy cinnamon bun deliciousness with others!  What is better than waking up to the smell of baked goods?!? Really, there isn't much you come up with, is there?


Besides, this frozen pumpkin has been staring at me every time I open the freezer. As you can see, I dated and measured before putting it in a freezer bag and flattening it out.  It makes it easier to use later, but watch out because the permanent marker can run when wet. 

I am big fan of sales, and Hydro Harvest Farms had pie pumpkins around Halloween for CHEAP!  They never got made into baked goods like I had intended.  By the time Thanksgiving weekend rolled around and I still was staring at three pie pumpkins, I finally decided I needed to just roast and freeze the suckers for when inspiration struck.  It doesn't look like much in roasted puree form, but it's magic gold to me!


Use a stand mixer with a paddle and a dough hook for this to save yourself the trouble if you can.  Start the stand mixer with the paddle attachment for this step.  Add the pumpkin puree (do not use pumpkin pie filling, it is not the same) to a mixing bowl with two eggs and a 1/4 cup of softened butter.  Run mixer on low until the butter has combined with the eggs and pumpkin until the butter has disintegrated into tiny little butter pebbles.  Cracking eggs into a small bowl before adding helps to ensure that no shell gets added to the bowl.

Combine your flours, dry milk powder, yeast and seasonings in another bowl.  After switching from the paddle shown above to a dough hook, add the dry ingredients to the mixing bowl a small bit at a time while mixing.  Allowing the dry ingredients time to incorporate into the wet before adding more helps to ensure that the dough incorporates fully.  After all the dry ingredients, begin adding the water a tablespoon at a time.  Allow about 30 seconds in between each tablespoon to allow the water to be incorporated into the dough.  Here's what the dough hook looks like:
 When you've added the right amount of water, the dough should look like this:  
Set aside your dough for about an hour and a half in a warm and dry location.  It's risen enough when it's doubled in size and is springy to the touch.  I just cover my dough filled bowl with a dish towel and leave it in an area where it's not going to be affected by a draft and near my timer.

While waiting for the dough to rise, I got together the cinnamon bun filling.  I combined cinnamon, sugar and minced crystallized ginger.  If you've never worked with crystallized ginger, it's a fancy-pants name for candied ginger and it's ginger cooked in a sugar water solution and then baked. I picked up a bit from the bulk bin at my local Whole Foods and finally used the last bit today.  Oil your knife before mincing with a very small amount of a neutral flavored oil, or expect to have the ginger to stick to the knife.  Here's what it looks like for the un-initiated.


Once the dough has risen fully, it's time to be rolled out into a rectangle.  The recipe said it should be rolled out to "about 14" x 22" rectangle."  I just rolled it until it looked two feet long and the size of two hands across.  It was good enough for me. Once rolled out, spread the filling mixture evenly across the whole dough leaving about one long edge free about a 1/2 inch from the edge.  This edge is the edge you will roll towards to be the outermost portion of the buns. The recipe said I could use some dried cranberry pieces, but I didn't have any this time.  It works that way too, if you like and have cranberries on hand.


After rolling these up, try to cut the dough cylinder into nine even segments.  I just eyeballed it.  This is where the overnight comes in to play.  You can grease your dish and put the buns in the pan to rise for the second time in the fridge overnight.  This is great for a potluck breakfast, but you may not be able to leave without giving up the recipe.  If you choose to make them the same day, the buns should rise for at least an hour undisturbed in a warm location.  The fridge's cold temperatures slows the yeast fermentation.


After putting the buns in the oven (preheated to 375 degrees), and giggling at the obvious jokes based on that phrase, walk away and leave them alone.  Do not take the buns out of the oven until they have become nice and tanned.  They are already a bit tan due to the pumpkin and spices, so we are looking for a middle of the summer Miami Beach tan not a mid-winter leftover tan.  This should take about 30 minutes. 

Take this time to make the glaze by melting the butter, milk (or almond milk in this case), and confectioner's sugar until it combines and turns glossy.  If you want to keep the glaze white and opaque, let the buns cool before pouring the sugary deliciousness on top.  If you just can't wait that long, like me, then pour it on about ten minutes after the buns are taken out of the oven. 


When done and cooled, if you don't wait to glaze them, the buns should look something like this:


Dough:
1 cup pumpkin puree
2 large eggs 
1/4 cup softened butter
2 1/2 cups All Purpose Flour - I use organic, unbleached flour, but any AP flour will work
1 3/4 cups Whole Wheat Flour
1/4 cup nonfat dry milk powder
1 teaspoon ground cinnamon
1/2 teaspoon ground ginger
1/4 teaspoon allspice
3 tablespoons dark brown sugar
1 1/2 teaspoons salt
2 teaspoons instant yeast
2 tablespoons to 1/4 cup lukewarm water

Filling:
1/2 cup minced crystallized ginger
3/4 cup granulated sugar
1 tablespoon ground cinnamon

Glaze:
1 cup confectioner sugar
1 tablespoon butter
1 1/2 tablespoons milk - I used almond milk 

Verdict:  These buns are decadent and not an every day breakfast, but if you need a warming and rich breakfast to impress yourself or others, this is a sure bet.  Just make sure you like ginger!

Monday, January 17, 2011

All Day Matzo Ball Soup

A cold and rainy day just calls for soup! It's finally been cold in Florida for the last week, and by cold I mean the high was in the 50s for at least two days straight.  It may not be much to you, but winter in Florida normally means highs in the 60s and 70s.  With weather like that, a day of cooking doesn't sound so promising.  A few times a year, I have a craving for chicken soup and it struck yesterday.  I had a full day off today (bonus, it was rainy and gross!) and a clean house, so why not spend the day stocking the fridge with chicken soup!!!


This is not a quick soup by any means, but it is worth it to have homemade chicken broth waiting for me in the fridge.

My soup starts with a whole chicken and the type of chicken makes a difference.  Only a kosher chicken will do in my chicken soup, and at Whole Foods, I found hormone free kosher chicken which made me day!  Check it out. 


My husband and I have an ongoing argument about whether using kosher chicken makes a difference, and I maintain that to make Jewish Penicillin it must start with a kosher chicken.  He hasn't ever been convinced, but I am the one cooking so I make the choice.   

In a large hot soup pot, sear the chicken parts skin down in a few tablespoons of oil.  When the chicken skin has started to brown, flip the chicken over.  This is about 3 minutes per side.  The goal is not to cook the chicken, just to sear the skin and render the fat a bit.  It helps to round out the flavor of the soup, I promise.  It doesn't look like much now, but just wait. 
 

Once the chicken is lightly browned on all sides, add enough water to cover the chicken and stop the browning process.  Turn down the heat to low and be careful of the steam!!!

At this point, add half a stalk of celery, four carrots, two turnips, one yellow onion - skin on, two parsnips, a tablespoon of black peppercorns and 4 garlic cloves.  Smash the garlic cloves just enough to remove the skins.  Cut the celery, carrots, turnips, parsnips and onion in half.  Cover the vegetables with water and then cover the pot. Keeping the onion skin on helps to color the broth, so don't skip this step.  Don't bother peeling the vegetables, they will not used in the finished soup.  I hear they are great in dog food, but I don't have a dog.  I end up nibbling on the vegetables while the soup is cooking.  They give the soup everything they have, so they aren't the most flavorful vegetables any more but they are filling while I am busy in the kitchen.


After one hour, take the chicken, vegetables and anything else left floating from the soup pot and allow to cool off in the fridge. 

Return the pot to the stove on low heat and cover. When the chicken is cool enough to touch, add the skin and bones and cartilage back to the pot and leave the chicken in the fridge to be added to the soup at the very end.  These other bits will flavor the broth so take care to add it all back to the pot.  Leave on the stove on low for about 3 hours.

During this slow simmering time, prep the vegetables that you will serve in the soup.  Trim, peel and dice half a stalk of celery, 4 carrots, 2 turnips and 2 parsnips.  After about three hours, add these prepared vegetables to the soup pot.


While these are busy cooking away in the soup pot, begin the matzo balls if you want them.  Not every chicken soup is matzo ball soup, but that's my goal here.  I am not making my matzo balls from scratch because I come from a long line of women using Manichevitz mix as a great short cut.  According to kosher traditions, eggs are not added directly to a dish, but are instead cracked into a small dish first to check for bloodspots which are not kosher.  I do not keep strictly kosher, but this tradition has its hold on me.


I follow the box's directions.  Why mess with family tradition?  I used the whole box, because this soup makes a LOT and I really like matzo balls.  When following the directions, the mix ends up looking like this:
When rolled into balls between oiled palms, the raw matzo balls end up looking like this:
Add these to their own pot of salted water and boil for about 15-20 minutes until they float and have doubled in size. 

This is a good time to skim the soup of any brown scummy bits that may be floating on top.  Add the chicken back to the pot when adding the matzo balls to their own pot, or about twenty minutes prior to serving if not making matzo balls. 

Following a great idea on canning, I made two Bell jars full of soup for lunches this week while plating up the soup for dinner.  The Bell Jars are water tight and are supposed to be great for a plastic-free packing alternative.


I packed up the soup in one large plastic container for meals during the week.

 Then, I packed up the remaining broth in other containers destined for the freezer. 

 Do you really need a verdict?  It's matzo ball soup, how can it possibly be bad?!?  Oh, and the husband finally agreed today that the chicken makes a difference.  I have soup and vindication!  My day can't get any better.

Wednesday, January 12, 2011

Pasta with Sauteed Tomatoes and Arugula

Wanna know how I can end up with this? Read on to find out!

 On this weekend's trip to Hydro Harvest Farms, I got the opportunity to give a friend a tour of all the deliciousness growing.  How could I resist this beautiful bounty?!?

 
The Farm has an entire row of arugula in the top towers and some sweet onions growing in the lower-most boxes.  Beautiful sight, right?  It's easy to be seduced by a view like this. I only walked away with one basket full and consider myself sensible for walking away with so little.

With that much arugula, I had to do something and, after I sampled a few leaves, it just screamed "pasta."  Some beautiful tomatoes that survived the Florida freezes were staring at me near the scales and they climbed into my basket too.  A dish started forming in the back of my mind - peppery arugula and sweet and tangy tomatoes would combine perfectly with some sharp and salty Pecorino Romano and Parmesan cheeses over some linguine.

Recipe:

Water for Pasta
1/2 box of linguine
4 tablespoons olive oil
6-8 garlic cloves, minced
4 cups arugula, stemmed and cleaned
3 small tomatoes, seeded and roughly chopped
1 cup garbanzo beans, with cooking liquid - or one can, drained with 1/2 cup water
1/4 cup white wine
1/2 teaspoon cayenne pepper
Salt and Pepper to Taste
Grated Pecorino Romano and Parmesan Cheese

Prep all ingredients according to the above specifications to have by the stove ready to go.  Put salted water on the stove set on high to boil for pasta.  Set a large pan on the stove as well.  In the large pan, heat the oil on medium high heat.  When shimmering, add the garlic until lightly tan.  Most of my recipes start this way, and for good reason....look at this...
 Add the tomatoes and cook until tomatoes begin to soften.  By this time, the water should be boiling so add the pasta to the water and turn down the heat to medium high.  Add a pinch of salt, beans and white wine to the pan.  When the liquid reaches a boil, add the greens to the pan and cook until the greens wilt and the liquids reduce by half. 

By this time, the pasta should be just barely al dente so pull the pasta off the heat and drain it!  Reserve about 1/4 cup of the pasta cooking water and add it with the pasta to the saute pan and add the grated cheese to the pan as well along with the cayenne pepper and additional salt and pepper to taste.

Cook together for about 5 minutes to allow the pasta to soak up the sauce in the bottom of the pan.  Serve with some grated cheese on top for garnish, if you so choose.

Pasta with Roasted Broccoli

Finding organic broccoli at the Farmer's Market this weekend meant I could finally make the Pasta with Roasted Broccoli I saw on a "Healthy Cooking" website a while back.  I figured that since it was so simple, it must be good.  I mean really, when you have something this good, how can it go wrong.


Yeah, I was wrong.  As my dear husband so nicely put it, this was an EPIC FAIL.  But it has promise, and will be made again.  Pasta with Roasted Broccoli will not beat me, and it will not beat you. Follow these directions, and you will hopefully do just fine....

The Recipe I Should Have Followed:
  • 8 oz whole wheat pasta
  • 1 1/2 lbs broccoli florets and stems
  • 8 cloves garlic, sliced
  • 6 tbsp extra virgin olive oil, or more
  • Salt and Pepper 
  • 1/2 cup fresh grated Pecorino Romano 
Preheat oven to 450°.  While your oven is pre-heating, chop the broccoli into florets and trim the stems of their woody outer stem and cut into bit size pieces.  Grate the cheese into a small dish and reserve.  In a baking dish, combine the broccoli, olive oil, garlic, salt and pepper. Roast broccoli about 20 minutes, tossing half way, until broccoli is browned and tender.


(Edit:  I did not follow this recipe, and added far too little olive oil making this very dry pasta with some decent tasting broccoli.)


Meanwhile, boil salted water in a large pot. Cook pasta according to package directions for al dente. In my case, I was using up some whole wheat pasta that I made a few months ago.  Before draining, reserve 1 cup of the water from the pasta.


Drain and toss pasta with broccoli. Add 1/2 cup reserved pasta water (or more if necessary), Pecorino Romano, salt and pepper to taste.


Cook pasta mixture to allow flavors of the sauce to cook into the pasta.  Serve with additional grated cheese.

Saturday, January 8, 2011

Chicken Stir Fry with Bok Choy, Snow Peas and Red Bell Pepper

Growing up, my mom would occasionally get the itch to experiment in the kitchen.  Before I was born, she took a class in Chinese Cooking and would refer to her yellowing notebook for inspiration.  Then my brother went away to college and brought back a love of sushi which my mom felt the need to perfect.  Because of these experiments in Asian foods, my kitchen pantry did not resemble that of my neighbors in my suburb.  We had sesame oil, rice wine vinegar, multiple bottles of soy sauce stored in the same pantry as the cereal, bread crumbs, and macaroni and cheese that my friends recognized.  In our small community, "Asian" ingredients were relegated to a shelf-sized section at the local grocery chain and bok choy didn't show up too often in the produce section. We had a small garden in our yard at one point, and I was definitely the only child I knew that snacked on snow peas (stolen) on the way to school. I credit my mom for my habit of experimenting in the kitchen, and every time I see bok choy I get the hankering for "stir fry" because that's how I remember our stir fry adventures beginning.

At Hydro Harvest Farm, I found bok choy last Sunday, and then remembered he had snow peas, and the itch to experiment started.  On a field trip to MD Oriental Market in Brandon, FL, I found vegetarian oyster sauce (no shellfish in our house) and it's been sitting gathering dust in our pantry and mocking me ever since.

Recipe:

4 tablespoons oil
4 cloves of garlic, minced
1/2 inch of fresh ginger, minced
2 chicken thighs, cut into 1/2 inch cubes
3 scallions, white and light green section thinly sliced 
1 head of bok choy, stems separated from greens and sliced, greens cut into strips
1 cup of snow peas - cleaned, with the tips snipped off if woody
1 red bell pepper, cut in strips

3 tbsp vegetarian oyster sauce
1/4 cup of rice wine vinegar
1/2 teaspoon sesame oil
1/4 cup of chicken broth, 1 tablespoon of broth reserved
1/2 teaspoon cayenne pepper1 teaspoon cornstarch

Cooked Brown Rice - 1/2 cup per person

*Serves two very hungry people with leftovers for lunch, but this should probably serve four.

Prepare all ingredients and have ready by the stove.  Stir frying moves quickly and you don't want to have to chop something while trying to make sure something isn't sticking to the bottom of the wok!!!  Heat the oil in a wok on high heat.  If you do not have a wok, use a large saute pan with plenty of room.  When shimmering, add the ginger and garlic and saute them until just beginning to brown.


Remove the ginger and garlic from the oil and reserve in a large bowl for later use.  Add the chicken to the hot, and now seasoned, oil.


When halfway cooked, add the scallions to the wok.


Cook chicken pieces in the oil until no pinkness remains.  Make sure to keep the chicken moving, as it may stick and burn. Do not overcook.  Remove the chicken and scallions; add to bowl containing the ginger and garlic. Add the stems of the bok choy to the oil.


Saute for one minute.  Add the snow peas and continue sauteing.  Add the pepper slices and continue sauteing.


Add all remaining ingredients except for bok choy leaves, the cornstarch and reserved chicken broth.  Keep the vegetables and seasonings moving in the wok.  In a small bowl, combine the corn starch to the reserved broth to make a slurry.  Once the liquid in the bottom of the wok is at a boil, make a well in the center of the wok, and add the slurry to the liquid and stir vigorously.  If you don't add this slowly, or skip this step, your cornstarch will form little balls in the stir fry and give it an off texture. Once all vegetables are tender but still crispy, add the bowl with the chicken mixture to the pot along with the bok choy greens. Continue cooking until the sauce thickens and the greens wilt.


Serve over brown rice to best enjoy all of the delicious sauce. 


Verdict:  Oh wow, this is good!!!  Like "why do I ever get take-out" good...  I might have a fight on my hands for these leftovers.