I have been craving some serious comfort food recently. I love playing with new and special ingredients, and I love fresh and fancy produce. However, when I need comfort, I do not turn to salad. I was raised in a house that relied heavily on meat and starch, after all.
Enter Cottage Pie. So many people were invited for Thanksgiving last year, that two Cottage Pies ended up as part of the spread to appease the masses. For
me, it stole the show! Cottage pie is a type of meat and vegetable pie
topped with mashed potatoes. Shepherd's pie is traditionally made with lamb, while Cottage pie is made with ground beef. Traditionally, the mashed potatoes are enriched with dairy and topped with cheese, but when paired with meat or at least not in our house! While trying to figure out what to make, I had never really thought of a savory pie because they so often combine meat and dairy. Typically, making a kosher savory pie means either making it meat free or making it with faux ingredients using chemicals of which I've never heard. Because of this, I avoided even trying. I typically just substitute oil for butter when cooking a meat meal, but then I found Earth Balance spread - kosher, pareve, vegan, and all natural. My Aunt's pie tasted so good, I decided I had to try! It turned out so well, and hit the spot on the need for comfort food. This is definitely a make-again recipe. So good, I have no pictures! Serve with a salad if your feeling fancy.
For the Meat Filling:
2 tablespoons canola oil
1 medium sized onion, diced
1 pound ground beef
3 large carrots, diced
1 cup chicken broth, reserved from Matzo Ball Soup
2 tablespoons tomato paste
1 tablespoon Worcestershire Sauce
2 tablespoons unbleached, all purpose flour
2 teaspoons fresh rosemary chopped
1 teaspoons fresh parsley, chopped
1 cup frozen peas
Salt and Pepper to Taste
For the Mashed Potato Topping:
3 Large Russet potatoes, peeled and cut into one inch pieces
3 tablespoons Earth Balance Spread
3 tablespoons caramelized onions, reserved from Onion and Thyme Rolls
1 egg
1 teaspoon garlic powder, or one roasted garlic clove if you've got it
Salt and Pepper to Taste
Peel the potatoes and cut into 1inch pieces. Place in a large saucepan and cover with salted, cold water. Set over medium-high heat, cover and bring
to a boil. Once boiling, cook until tender and easily pierced with a fork,
approximately 10 to 15 minutes. Drain the potatoes in a colander and then
return to the saucepan. Mash the potatoes and then add the spread, caramelized onions, salt and pepper and continue to mash until smooth. Stir
in the egg until well combined.
Preheat the oven to 400 degrees F.
While the potatoes are cooking, prepare the filling. Place the
canola oil into a 12-inch saute pan and set over medium high heat. Once
the oil begins to shimmer, add the onion and carrots and saute just until they
begin to take on color, approximately 3 to 4 minutes. Add the beef, salt and pepper and cook until
browned and cooked through, approximately 3 minutes. Sprinkle the meat
with the flour and toss to coat, continuing to cook for another minute.
Add the tomato paste, chicken broth, Worcestershire, rosemary, and stir to combine. Bring to a boil, reduce the heat to low, cover and
simmer slowly 10 to 12 minutes or until the sauce is thickened
slightly.
Add the peas to the beef mixture and spread evenly into a large glass casserole dish or . Top with the mashed potatoes, starting
around the edges to create a seal to prevent the mixture from bubbling
up and smooth with a rubber spatula. Place on a parchment lined baking sheet on the middle rack of the oven and bake for 25 minutes or just
until the potatoes begin to brown. Remove to a cooling rack for at
least 15 minutes before serving.
Showing posts with label Carrots. Show all posts
Showing posts with label Carrots. Show all posts
Sunday, December 4, 2011
Wednesday, April 20, 2011
Cabbage Salad
Chag Pesach Sameach/Happy Passover! After two Sederim, plural for Seder (the ordered meal where we retell the story of the Exodus), I was craving something light and crunchy. I can only eat so much matzo, meat and starch! We just got home from celebrating the beginning of this beautiful holiday with relatives in South Florida, and the first thing I did after unpacking was crack open my Nanny's cookbooks for ideas on what to make for the rest of the holiday. This recipe, with a bit of tweaking, was something I could make easily out of things I already had in the house. During the seder, "we ask why do we eat bitter herbs?" Well, after eight days your body will begin screaming "enough matzo already" and will be craving an abundance of herbs to help the matzo along and out! Why wait? This recipe reminds me of something I used to have when I was a kid and my family went out for "deli"and is a perfect accompaniment to a meat or dairy meal.

This salad, with the assistance of the food processor passed down to me by my wonderful mother-in-law, only took ten minutes from start to finish and made enough that I will have enough for every day left of this wonderful holiday.

Using the grater blade of the food processor, or on the coarse side of a box grater, grate one cored head of green cabbage, three medium sized carrots, one medium onion and two cucumbers. Put all of these grated vegetables into a large non-reactive bowl - preferably glass if you have it. Then, blend the ginger, sugar, salt, white vinegar and and cold water until the ginger and sugar disappears into the liquid.
Add this salad dressing to the bowl and mix well. Let stand for one hour for optimum deliciousness!

Ingredients:
Salad -
1 head green cabbage, cored
3 medium sized carrots
1 medium sized white onion
2 cucumbers
Dressing -
1 cup cold water
1 cup white vinegar
3 tablespoons vegan cane sugar
1 tablespoon salt
1 inch piece of peeled ginger
This makes a party sized amount!
Saturday, March 12, 2011
Nanny's Hamantashen with Prune Filling and my variation - Spiced Carrot Wholewheat Hamantashen too!
While most kids were babysat by a local teen, I was babysat by my grandparents. I was the youngest grandchild of four and was the only one to grow up just a few steps away from her home, so I was just a bit spoiled. My grandfather, Pop Pop, always had candy in the freezer for me, and Nanny always had something homemade waiting to be defrosted for my enjoyment. Growing up, my maternal grandmother - Nanny - was a great cook, but she was THE baker of the family. It's no wonder I grew up with an interest in food!
When I showed an interest in cooking, my grandparents delighted in it and started providing me with my own cookbooks. Every Chanukah, I would get cookbooks. I blame Nanny for my extensive cookbook collection. I was just learning from her - my grandfather was continually building more bookshelves for her collection of books, clippings and recordings of PBS cooking shows. When I went off to college, she began "loaning" me cookbooks. I say "loaning" because we both knew that those books would never come back to her. I was once notorious for my Borg-like ability to assimilate my family's belongings into my own collection. Then, her appliances starting their trek to my kitchen too. While she was alive, she looked forward to my Friday afternoon phone calls telling her which of her precious books I had used and what I had cooked that week. Mostly, we talked about Jewish food traditions and family food traditions.
Nanny died several years ago after succumbing to colon cancer. While in the hospital, she wouldn't talk to me about her illness. Instead, we talked about food. She made me promise to split her cookbook collection with my mom, and to use the cookbooks well. On a recent trip home with my older brother, I found my Nanny's treasured collection of her favorite recipes handwritten in a small green plaid binder which I am sure she got as a freebie from a cookbook publisher as a reward for her many purchases. In this binder was this recipe for Hamantashen with Lekvar, or prune filling. I can't call Nanny every Friday like I once did, but I get to remember her every time I'm in the kitchen. Nanny, this one's for you.

For those of you not 'in the know' - Hamantashen are one of my favorite Jewish food traditions. They are eaten for the holiday of Purim which celebrates the story of the Jewish Queen Esther and her rescuing of the Jewish people from a king's adviser - Haman - who wished to exterminate the Jews in the Persian Empire. This is the basis for many Jewish Holidays - they tried to kill us, we won, let's eat! Above are the two types of Hamantashen I made this year. I made my Nanny's Orange Sugar Cookie based treat as well as an improvised Spiced Carrot Wholewheat version. I filled each with Nanny's Prune Filling, known as Levkar among Eastern European Jews, or some homemade strawberry jam I had lying about from last year.
To make the either Hamantashen, first set out a stick of butter to soften. I did this while I was doing the dishes. Then, sift together two cups of unbleached, all purpose flour, salt and baking powder and set it aside. Cream together the softened butter and one cup of sugar for about two minutes or until "light and fluffy" as my Nanny put it.
 Then, add one egg and mix for one minute. After this, mix in orange juice and vanilla. Add the flour mixture a bit at a time, until well incorporated. Shape the dough into a flat disk on a large sheet of wax paper and place in the fridge until firm enough to roll out. At this point in the handwriten recipe, Nanny makes sure to remind the reader to roll out the dough after sandwiching the dough between a second sheet of wax paper, "making sure to roll from the center." Thanks for the reminder Nanny. She even gives a note to put it in the freezer if the dough is too hard to handle. I found that spooning the dough from the wax paper and rolling in a bit of extra flour helped to make the dough easier to work. This dough was marked with a sticker saying "my favorite recipe" and after tasting a baked cookie, I can attest to that. This was my family's go - to Hamantashen recipe and now it can be yours too.
Ingredients:
1/4 pound butter softened, this is typically one stick
1 cup sugar
2 Cups Unbleached, All Purpose Flour
1/2 teaspoon salt
2 teaspoon baking powder
1 large egg
1/2 cup orange juice
1 teaspoon vanilla
***My Variation - Spiced Carrot Wholewheat Hamantashen
Following the same recipe above, substitute Unbleached, Wholewheat Flour for the All Purpose. Also, substitute carrot juice (my juicer is good for something!) for orange juice and add 3/4 teaspoon of garam masala. While garam masala is a spice mixture that is often used in Indian savory dishes, it's a warming mixture of spices that reminds me of pumpkin pie spice and really accentuates the carrot in an delicious and somewhat unusual way.
Prune is a traditional filling that is now often left behind in favor of more modern fillings like strawberry, cherry and chocolate. I think prune is making a come back, or it will if more people try this filling.
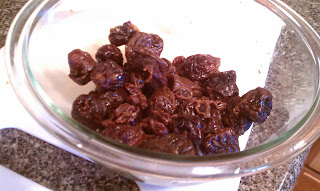
First, place raisins and prunes in hot water in a bowl for 15 minutes to allow the fruits to plump and soften.
 Drain the fruit and then place the fruit in a food processor along with honey, vanilla, lemon juice and cinnamon. Process until smooth. If using the nuts, fold them into the filling now.
 My grandmother used less lemon juice and split half of the honey with brown sugar, and then blended it with chopped nuts. I simplified the recipe a bit and made it to my tastes, but tried to keep to tradition. I liked the tartness of the filling, but my hubby thinks I should have stayed closer to Nanny's amounts for the lemon juice.
Filling Ingredients:
9 ounces pitted prunes (dried plums)
1/3 cup raisins
2 cups hot water
2 tablespoons honey (Nanny's recipe stated 1 tablespoon honey, 1 tablespoon brown sugar)
1/2 teaspoon vanilla
1/4 teaspoon cinnamon
2 tablespoons lemon juice (Nanny's recipe says 2 teaspoons, I just read it wrong)
*1/2 cup nuts, toasted and cooled (no nut is specified, but she was partial to walnuts)
Assembling the cookies:
Preheat your oven to 350 degrees. After rolling each dough piece into a three inch circle, fill each circle with a 1/2 teaspoon of your favorite filling and fold the dough to make an equilateral triangle.
 Bake for 15 to 20 minutes and then cool on a wire rack.
 As you can see, the ones with jam have a tendency to spread a bit so be forewarned and bake these cookies on parchment paper. These cookies last for several days, but very rarely make it that far in my house. They also freeze beautifully, but better as dough then as baked cookies.
When I showed an interest in cooking, my grandparents delighted in it and started providing me with my own cookbooks. Every Chanukah, I would get cookbooks. I blame Nanny for my extensive cookbook collection. I was just learning from her - my grandfather was continually building more bookshelves for her collection of books, clippings and recordings of PBS cooking shows. When I went off to college, she began "loaning" me cookbooks. I say "loaning" because we both knew that those books would never come back to her. I was once notorious for my Borg-like ability to assimilate my family's belongings into my own collection. Then, her appliances starting their trek to my kitchen too. While she was alive, she looked forward to my Friday afternoon phone calls telling her which of her precious books I had used and what I had cooked that week. Mostly, we talked about Jewish food traditions and family food traditions.
Nanny died several years ago after succumbing to colon cancer. While in the hospital, she wouldn't talk to me about her illness. Instead, we talked about food. She made me promise to split her cookbook collection with my mom, and to use the cookbooks well. On a recent trip home with my older brother, I found my Nanny's treasured collection of her favorite recipes handwritten in a small green plaid binder which I am sure she got as a freebie from a cookbook publisher as a reward for her many purchases. In this binder was this recipe for Hamantashen with Lekvar, or prune filling. I can't call Nanny every Friday like I once did, but I get to remember her every time I'm in the kitchen. Nanny, this one's for you.

For those of you not 'in the know' - Hamantashen are one of my favorite Jewish food traditions. They are eaten for the holiday of Purim which celebrates the story of the Jewish Queen Esther and her rescuing of the Jewish people from a king's adviser - Haman - who wished to exterminate the Jews in the Persian Empire. This is the basis for many Jewish Holidays - they tried to kill us, we won, let's eat! Above are the two types of Hamantashen I made this year. I made my Nanny's Orange Sugar Cookie based treat as well as an improvised Spiced Carrot Wholewheat version. I filled each with Nanny's Prune Filling, known as Levkar among Eastern European Jews, or some homemade strawberry jam I had lying about from last year.
To make the either Hamantashen, first set out a stick of butter to soften. I did this while I was doing the dishes. Then, sift together two cups of unbleached, all purpose flour, salt and baking powder and set it aside. Cream together the softened butter and one cup of sugar for about two minutes or until "light and fluffy" as my Nanny put it.

Ingredients:
1/4 pound butter softened, this is typically one stick
1 cup sugar
2 Cups Unbleached, All Purpose Flour
1/2 teaspoon salt
2 teaspoon baking powder
1 large egg
1/2 cup orange juice
1 teaspoon vanilla
***My Variation - Spiced Carrot Wholewheat Hamantashen
Following the same recipe above, substitute Unbleached, Wholewheat Flour for the All Purpose. Also, substitute carrot juice (my juicer is good for something!) for orange juice and add 3/4 teaspoon of garam masala. While garam masala is a spice mixture that is often used in Indian savory dishes, it's a warming mixture of spices that reminds me of pumpkin pie spice and really accentuates the carrot in an delicious and somewhat unusual way.
Prune is a traditional filling that is now often left behind in favor of more modern fillings like strawberry, cherry and chocolate. I think prune is making a come back, or it will if more people try this filling.
First, place raisins and prunes in hot water in a bowl for 15 minutes to allow the fruits to plump and soften.


Filling Ingredients:
9 ounces pitted prunes (dried plums)
1/3 cup raisins
2 cups hot water
2 tablespoons honey (Nanny's recipe stated 1 tablespoon honey, 1 tablespoon brown sugar)
1/2 teaspoon vanilla
1/4 teaspoon cinnamon
2 tablespoons lemon juice (Nanny's recipe says 2 teaspoons, I just read it wrong)
*1/2 cup nuts, toasted and cooled (no nut is specified, but she was partial to walnuts)
Assembling the cookies:
Preheat your oven to 350 degrees. After rolling each dough piece into a three inch circle, fill each circle with a 1/2 teaspoon of your favorite filling and fold the dough to make an equilateral triangle.


Sunday, February 20, 2011
Carrot, Leek and Chickpea Soup
Some days just call for soup! This was a clean out the fridge soup, and turned out so well I ate it all week.

Remember this picture?

I still have way too many carrots and am trying desperately to use them up!
Due to a camera malfunction, and by malfunction I mean I broke it, I am relying on my camera phone for blogging purposes. Sadly, this is the only photo of the soup that survived the transfer.
To make the soup, first chop two large leeks in half, and then in shreds. Make sure to wash the leeks before you cook them, they do collect sand in between the layers. Slice about 6 small cloves of garlic. Peel and slice three large carrots into thin half moons. Heat about three tablespoons of olive oil in a large soup pot. Saute the leeks until they become softened and pliant. Add the garlic and saute for one minute. Add carrots and saute until they begin to soften and add about two quarts of chicken broth. Bring the soup up to a simmer and add a bay leaf, a teaspoon of black peppercorns, a Parmesan cheese rind and 4 cups of chick peas. If not using your own cooked chick peas, then add two cans of rinsed chick peas. Simmer on low for about an hour. If you would like to, add cooked pasta before serving. If planning to cook the pasta in the soup, add more broth!
Ingredients:
2 Large Leeks
6 garlic cloves
3 large carrots
2 quarts of chicken broth
1 bay leaf
1 teaspoon black peppercorns
1 Parmesan cheese rind
4 cups cooked chick peas
2 cups cooked pasta
For a soup that eats like a meal, serve with cheesy garlic bread!
Tuesday, February 8, 2011
Ginger Carrot Breakfast Muffins
My inspiration this week is clean out my kitchen!!! As part of the last two weeks' worth of funk, I realized that my kitchen is so stocked, that I might not have to go food shopping to for meals for the entire week. So for breakfast this week, I have decided I need to make these Ginger Carrot Muffins I found while figuring out a way to use up the carrots I have in my fridge.

As part of a discussion with a friend around New Year's, my hubby and I decided we need to break out the juicer and start juicing more often. Or really, I asked hubby to bring home some juice when I was sick with a stomach bug and he brought home this:

Ingredients:
1 3/4 cups Whole Wheat Flour
1/2 cup oat flour*
3/4 cup honey
1/2 cup milled flax*
1 teaspoon baking powder
1/4 teaspoon baking soda
1 teaspoon ground cinnamon
1/2 teaspoon salt
1/3 cup minced crystallized ginger
1/4 cup chopped walnuts
2 large eggs
1 cup buttermilk - or in my case 1 cup milk with 1 tablespoon white vinegar to sour the milk
1/3 cup vegetable oil
2 cups grated carrots
*Most people probably don't have this all on hand, but I'm weird. To make the oat flour and to grate the carrots, make your life easy and use a food processor. Do this separately! I use ground flax in my smoothies to give me extra fiber, and get it at any natural foods store. Keep it in the freezer, as it's highly perishable. Also, if you don't want to use honey, switch it out in equal portions for vegan cane sugar like the original recipe shows, but I have an unholy obsession with honey and try to use it in my baking whenever possible.
I'm not kidding about the obsession - here is the current honey survey of my pantry. Well minus the Queen LaBeeva brand that I just used up.

Recipe:
Preheat the oven to 350 degrees. Lightly grease a 12-cup muffin pan. If you only have a six muffin pan like me, use that and prepare to do part of this recipe twice. |
| In a medium-sized bowl, whisk together the dry ingredients, including the minced crystallized ginger. |
In a small bowl, whisk together the eggs, buttermilk, honey and oil, and stir into the dry ingredients. Fold in the carrots. It does not look pretty at this stage, but just trust me on this one.  |
Spoon the batter into the muffin cups, filling them almost full. Allow the muffins to rest for 10 minutes before baking. |
| Bake the muffins for 20 minutes, or until a toothpick inserted in the center of one comes out clean. If you don't have a toothpicks, try using a piece of dry spaghetti. It works! |
| Remove the muffins from the oven, and cool in the pan for 5 minutes before transferring to a rack to cool completely. |
 These are so good. One was sacrificed for testing purposes, but started out as a crumb test and somehow disappeared. :) I'll be having them for breakfast this week - split and topped with peanut butter and Citrus Marmalade. |

Monday, January 17, 2011
All Day Matzo Ball Soup
A cold and rainy day just calls for soup! It's finally been cold in Florida for the last week, and by cold I mean the high was in the 50s for at least two days straight. It may not be much to you, but winter in Florida normally means highs in the 60s and 70s. With weather like that, a day of cooking doesn't sound so promising. A few times a year, I have a craving for chicken soup and it struck yesterday. I had a full day off today (bonus, it was rainy and gross!) and a clean house, so why not spend the day stocking the fridge with chicken soup!!!

This is not a quick soup by any means, but it is worth it to have homemade chicken broth waiting for me in the fridge.
My soup starts with a whole chicken and the type of chicken makes a difference. Only a kosher chicken will do in my chicken soup, and at Whole Foods, I found hormone free kosher chicken which made me day! Check it out.

My husband and I have an ongoing argument about whether using kosher chicken makes a difference, and I maintain that to make Jewish Penicillin it must start with a kosher chicken. He hasn't ever been convinced, but I am the one cooking so I make the choice.
In a large hot soup pot, sear the chicken parts skin down in a few tablespoons of oil. When the chicken skin has started to brown, flip the chicken over. This is about 3 minutes per side. The goal is not to cook the chicken, just to sear the skin and render the fat a bit. It helps to round out the flavor of the soup, I promise. It doesn't look like much now, but just wait.

Once the chicken is lightly browned on all sides, add enough water to cover the chicken and stop the browning process. Turn down the heat to low and be careful of the steam!!!
At this point, add half a stalk of celery, four carrots, two turnips, one yellow onion - skin on, two parsnips, a tablespoon of black peppercorns and 4 garlic cloves. Smash the garlic cloves just enough to remove the skins. Cut the celery, carrots, turnips, parsnips and onion in half. Cover the vegetables with water and then cover the pot. Keeping the onion skin on helps to color the broth, so don't skip this step. Don't bother peeling the vegetables, they will not used in the finished soup. I hear they are great in dog food, but I don't have a dog. I end up nibbling on the vegetables while the soup is cooking. They give the soup everything they have, so they aren't the most flavorful vegetables any more but they are filling while I am busy in the kitchen.

After one hour, take the chicken, vegetables and anything else left floating from the soup pot and allow to cool off in the fridge.

Return the pot to the stove on low heat and cover. When the chicken is cool enough to touch, add the skin and bones and cartilage back to the pot and leave the chicken in the fridge to be added to the soup at the very end. These other bits will flavor the broth so take care to add it all back to the pot. Leave on the stove on low for about 3 hours.
During this slow simmering time, prep the vegetables that you will serve in the soup. Trim, peel and dice half a stalk of celery, 4 carrots, 2 turnips and 2 parsnips. After about three hours, add these prepared vegetables to the soup pot.

While these are busy cooking away in the soup pot, begin the matzo balls if you want them. Not every chicken soup is matzo ball soup, but that's my goal here. I am not making my matzo balls from scratch because I come from a long line of women using Manichevitz mix as a great short cut. According to kosher traditions, eggs are not added directly to a dish, but are instead cracked into a small dish first to check for bloodspots which are not kosher. I do not keep strictly kosher, but this tradition has its hold on me.

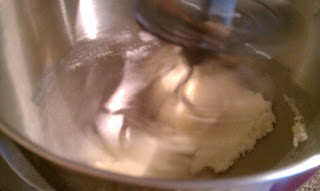
I follow the box's directions. Why mess with family tradition? I used the whole box, because this soup makes a LOT and I really like matzo balls. When following the directions, the mix ends up looking like this:
 When rolled into balls between oiled palms, the raw matzo balls end up looking like this:
 Add these to their own pot of salted water and boil for about 15-20 minutes until they float and have doubled in size.
This is a good time to skim the soup of any brown scummy bits that may be floating on top. Add the chicken back to the pot when adding the matzo balls to their own pot, or about twenty minutes prior to serving if not making matzo balls.
Following a great idea on canning, I made two Bell jars full of soup for lunches this week while plating up the soup for dinner. The Bell Jars are water tight and are supposed to be great for a plastic-free packing alternative.

I packed up the soup in one large plastic container for meals during the week.

Then, I packed up the remaining broth in other containers destined for the freezer.
 Do you really need a verdict? It's matzo ball soup, how can it possibly be bad?!? Oh, and the husband finally agreed today that the chicken makes a difference. I have soup and vindication! My day can't get any better.

This is not a quick soup by any means, but it is worth it to have homemade chicken broth waiting for me in the fridge.
My soup starts with a whole chicken and the type of chicken makes a difference. Only a kosher chicken will do in my chicken soup, and at Whole Foods, I found hormone free kosher chicken which made me day! Check it out.

My husband and I have an ongoing argument about whether using kosher chicken makes a difference, and I maintain that to make Jewish Penicillin it must start with a kosher chicken. He hasn't ever been convinced, but I am the one cooking so I make the choice.
In a large hot soup pot, sear the chicken parts skin down in a few tablespoons of oil. When the chicken skin has started to brown, flip the chicken over. This is about 3 minutes per side. The goal is not to cook the chicken, just to sear the skin and render the fat a bit. It helps to round out the flavor of the soup, I promise. It doesn't look like much now, but just wait.

Once the chicken is lightly browned on all sides, add enough water to cover the chicken and stop the browning process. Turn down the heat to low and be careful of the steam!!!
At this point, add half a stalk of celery, four carrots, two turnips, one yellow onion - skin on, two parsnips, a tablespoon of black peppercorns and 4 garlic cloves. Smash the garlic cloves just enough to remove the skins. Cut the celery, carrots, turnips, parsnips and onion in half. Cover the vegetables with water and then cover the pot. Keeping the onion skin on helps to color the broth, so don't skip this step. Don't bother peeling the vegetables, they will not used in the finished soup. I hear they are great in dog food, but I don't have a dog. I end up nibbling on the vegetables while the soup is cooking. They give the soup everything they have, so they aren't the most flavorful vegetables any more but they are filling while I am busy in the kitchen.

After one hour, take the chicken, vegetables and anything else left floating from the soup pot and allow to cool off in the fridge.

Return the pot to the stove on low heat and cover. When the chicken is cool enough to touch, add the skin and bones and cartilage back to the pot and leave the chicken in the fridge to be added to the soup at the very end. These other bits will flavor the broth so take care to add it all back to the pot. Leave on the stove on low for about 3 hours.
During this slow simmering time, prep the vegetables that you will serve in the soup. Trim, peel and dice half a stalk of celery, 4 carrots, 2 turnips and 2 parsnips. After about three hours, add these prepared vegetables to the soup pot.

While these are busy cooking away in the soup pot, begin the matzo balls if you want them. Not every chicken soup is matzo ball soup, but that's my goal here. I am not making my matzo balls from scratch because I come from a long line of women using Manichevitz mix as a great short cut. According to kosher traditions, eggs are not added directly to a dish, but are instead cracked into a small dish first to check for bloodspots which are not kosher. I do not keep strictly kosher, but this tradition has its hold on me.

I follow the box's directions. Why mess with family tradition? I used the whole box, because this soup makes a LOT and I really like matzo balls. When following the directions, the mix ends up looking like this:


This is a good time to skim the soup of any brown scummy bits that may be floating on top. Add the chicken back to the pot when adding the matzo balls to their own pot, or about twenty minutes prior to serving if not making matzo balls.
Following a great idea on canning, I made two Bell jars full of soup for lunches this week while plating up the soup for dinner. The Bell Jars are water tight and are supposed to be great for a plastic-free packing alternative.

I packed up the soup in one large plastic container for meals during the week.

Then, I packed up the remaining broth in other containers destined for the freezer.

Subscribe to:
Posts (Atom)