Welcome to Seduced by Produce

I get pleasure out of experimenting in my kitchen with food. I am helpless against the siren song of beautiful fruits, vegetables and herbs. I love going to local farms and farmer's markets, taking home my purchases, and then trying to figure out healthy and delicious ways to cook it all. That doesn't mean that I don't make unhealthy foods, but when I do, I try to make them worth the calories and time. I don't cook every day, but when I do, I want it to be delicious.
Showing posts with label Arugula. Show all posts

Monday, February 7, 2011

Penne with Arugula, Grape Tomatoes and Cannelini Beans

Last month's Pasta with-Sauteed Tomatoes and Arugula still fresh in my mind, and tomatoes still in season in Florida, means that this is a recipe that was begging for updates and remakes all season long.  This week, I used grape tomatoes left over from an impulse buy at Worden Farm stand at the St. Petersburg Morning Market last weekend and arugula from one of my favorite places, Hydro Harvest Farms.  This is a great Meatless Monday dish, but works for any night of the week. 

I did things just a little bit differently this time around.

Ingredients:

Water for Pasta
4 ounces of penne pasta

1/4 cup olive oil
6 garlic cloves, minced
3 cups arugula, stemmed and cleaned
Pint of grape tomatoes, cut in half
1 can cannellini beans, drained with 1/2 cup water
1/4 cup white wine
Salt and Pepper to Taste
Grated Pecorino Romano

Recipe:

Prep all ingredients according to the above specifications to have by the stove ready to go.  Put salted water on the stove set on high to boil for pasta.  Set a large pan on the stove as well.  In the large pan, heat the oil on medium high heat.  When shimmering, add the garlic until lightly tan. It's just not cooking in my house until you can see this:

Add the tomatoes and cook until tomatoes begin to soften and blister.


By this time, the water should be boiling so add the pasta to the water and turn down the heat to medium high.  Add salt, pepper, beans and white wine to the pan.  When the liquid reaches a boil, add the greens to the pan and cook until the greens wilt and the liquids reduce by half.


Drain your al dente pasta and add it with a 1/2 cup of the reserved pasta cooking water to the pan.  Cook the pasta with the mixture for about 5 minutes, or until the liquid has thickened.  Add salt and pepper to taste.  Grate some pecorino romano cheese on top and serve.  


Yeah, I love living in Florida this time of year.  Tomatoes and 70 degree days in February is not a bad way to live. 


Wednesday, January 12, 2011

Pasta with Sauteed Tomatoes and Arugula

Wanna know how I can end up with this? Read on to find out!

 On this weekend's trip to Hydro Harvest Farms, I got the opportunity to give a friend a tour of all the deliciousness growing.  How could I resist this beautiful bounty?!?

 
The Farm has an entire row of arugula in the top towers and some sweet onions growing in the lower-most boxes.  Beautiful sight, right?  It's easy to be seduced by a view like this. I only walked away with one basket full and consider myself sensible for walking away with so little.

With that much arugula, I had to do something and, after I sampled a few leaves, it just screamed "pasta."  Some beautiful tomatoes that survived the Florida freezes were staring at me near the scales and they climbed into my basket too.  A dish started forming in the back of my mind - peppery arugula and sweet and tangy tomatoes would combine perfectly with some sharp and salty Pecorino Romano and Parmesan cheeses over some linguine.

Recipe:

Water for Pasta
1/2 box of linguine
4 tablespoons olive oil
6-8 garlic cloves, minced
4 cups arugula, stemmed and cleaned
3 small tomatoes, seeded and roughly chopped
1 cup garbanzo beans, with cooking liquid - or one can, drained with 1/2 cup water
1/4 cup white wine
1/2 teaspoon cayenne pepper
Salt and Pepper to Taste
Grated Pecorino Romano and Parmesan Cheese

Prep all ingredients according to the above specifications to have by the stove ready to go.  Put salted water on the stove set on high to boil for pasta.  Set a large pan on the stove as well.  In the large pan, heat the oil on medium high heat.  When shimmering, add the garlic until lightly tan.  Most of my recipes start this way, and for good reason....look at this...
 Add the tomatoes and cook until tomatoes begin to soften.  By this time, the water should be boiling so add the pasta to the water and turn down the heat to medium high.  Add a pinch of salt, beans and white wine to the pan.  When the liquid reaches a boil, add the greens to the pan and cook until the greens wilt and the liquids reduce by half. 

By this time, the pasta should be just barely al dente so pull the pasta off the heat and drain it!  Reserve about 1/4 cup of the pasta cooking water and add it with the pasta to the saute pan and add the grated cheese to the pan as well along with the cayenne pepper and additional salt and pepper to taste.

Cook together for about 5 minutes to allow the pasta to soak up the sauce in the bottom of the pan.  Serve with some grated cheese on top for garnish, if you so choose.

Tuesday, January 4, 2011

Chicken "Burgers"

Recently, I've been playing with my new cast iron grill pan, and the house favorite to play with is burgers.  In keeping with the New Year/New You idea, I went with chicken "burgers" for dinner tonight. I say burger in quotation marks because I just can't write chicken and burger together without them.  If I did, I'd end up feeling that I was somehow not be honest with you.  Burger = beef  and "burger" = any other patty in my book.

Tempted by the Brew (I haven't decided on a blog nickname for my husband yet, but since his hobby is brewing beer, he suggested this one) made the meal while I was busy getting caught up in my work.  While shopping on Sunday, we decided to use some sliced "gourmet" mushrooms hidden away in the produce section of Whole Foods that called my name from the forgotten corner and now sitting in my refrigerator mocking me.  To add on the delicious produce and pretend a "burger" can ever be healthy, we added the arugula picked up this weekend from the farm, and a red onion to make a great "burger".  Ok, I lied.  He had the onion.  I can't, or at least shouldn't, eat raw onions due to a diagnosis with acid reflex that I remember when it suits me.

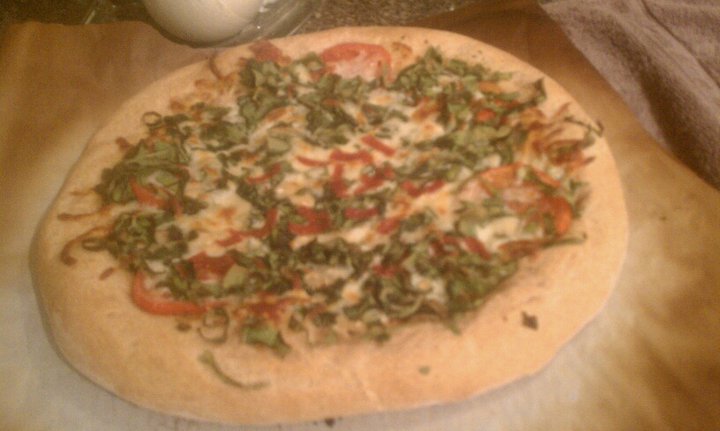
While I was busy forgetting what time it was due to good news in the world of social work,Tempted by the Brew got busy cooking.  This is what I came home to tonight:


The Murray's Chicken "Burgers" I found on sale at Publix were sizzling away on the cast iron grill pan and all it took for the mushrooms to be added to the stove top was a gentle reminder by way of me taking it out of the refrigerator and putting it out on the counter.  Subtle, right?  Let's just say mushrooms are notTempted by the Brew's favorite addition to our meals and they make it in very often anyway.  I just can't get enough of them!

This is the part of the night when the greens argument rages again.  Our home is at a stalemate - I like mine at least wilted unless the greens are part of a salad.  He likes them raw.  He's right health-wise and texture-wise, but I know what I like and my tastebuds just don't want to hear it.  I lost this battle tonight and had my burger with raw arugula.

But......It didn't matter!  This burger looked so good that I just had to dig in, even before I remembered to take a photo.


Recipe:

4 Murray's Chicken "Burgers"
4 Cottage Cheese Dill Rolls from earlier in the week, sliced in half
1 Package of Mixed Sliced Gourmet Mushrooms - a mix of oyster, cremini and another mushroom that I have already forgotten
1 garlic clove, sliced
About 20 medium sized arugula leaves - thicker stems removed
*Red Onion
1 tablespoon Olive Oil
Salt and Pepper

Serves 4 - 1 burger per person

Heat grill pan and small saute pan on medium heat. While these are heating up, slice up the garlic clove and onion and prep the arugula. I went with the idea of about five leaves per burger.  Grill chicken for about 3 -5 minutes per side.  Chicken is not ok undercooked in our house, so we err on the side of caution here.  At the same time, you should also begin to saute the garlic and a minute later, add the mushrooms to the garlic and oil.  Tempted by the Brew did this a little later, after the mushrooms mysteriously ended up on the counter by the fridge. When the "burger" is seared well on one side and easily separates from the pan, flip it for another 3-5 minutes.  At some point, check the mushrooms to make sure they are cooking evenly in the pan.  Stir them occasionally while you are at it.  When the chicken is cooked throughout, set them to the rest and reabsorb all the meat-juices (it's chicken, so that's not much).  While this is happening, we grilled the rolls in the grill pan until they developed some nice grill markings. It was about this time that the mushrooms looked done and were taken off the heat.

Now comes the best part - putting it all together. I won't tell you how to do that.  If you are making this, it is your unalienable right to put together your "burger" however you see fit.  If you see a chicken "burger" fit at all, that is.  If this recipe is making you say, "Where's the Beef" a la old school Wendy's commercials - then by all means, go for beef!

*This is where my wonderful sense of measurement fails my blog responsibility.  We just did two slices since Tempted by the Brew was the only one eating it, but the slices were probably equal to 1/4 of a medium sized onion.

Sunday, January 2, 2011

Whole Wheat Pizza with Greens and Tomatoes

After much prodding by friends and family, I am sharing my love for food in a blog of my very own :)

To introduce myself, here is a short explanation of what you can expect to see here at Seduced by Produce:

I get pleasure out of experimenting in my kitchen  with food.  I love going to local farms and farmer's markets, taking home my purchases, and then trying to figure out healthy and delicious ways to cook it all.  If I can't get it direct from a farmer, I try to find foods that pack a nutritional punch and are "eco-friendly."  That doesn't mean that I don't make unhealthy foods, but when I do, I try to make them worth the calories and time.  When I cook, I try to cook from scratch as much as possible and practical.  When I cook from scratch, I tend to cook using measurements like"some of this"  "a bit of that" and cook "until it looks right" but am working on using my measuring skills more often so the food can be replicated.  When I get home, some days I need a way to decompress and some days I just need to refuel.  Every day, I want to eat food that is delicious. 

Here's my first recipe using up what my eyes couldn't resist from the farm - Whole Wheat Pizza with Greens and Tomatoes
Whole Wheat Pizza Dough:
1 1/3 cups water
1/4 olive oil
1 1/2 teaspoons salt
1 1/2 cup whole wheat flour
2 cups all purpose unbleached flour
2 1/2 teaspoons bread machine yeast

*Makes two pizzas

I love my bread machine for kneading doughs so I don't have to worry about proofing and can let the machine do the work while I am on to my next project (or just sitting watching TV.)
  
My bread machine specifies that all liquids go in first with the salt, and then the flours with the yeast on top.  I put it all in on the wonderful setting of "pizza dough" and finished prepping the farm produce while the machine did its thing.

When the dough was done, I separated it into two parts and let it rest in baggies in the fridge for an hour until it rose by about 20 percent. 

While the dough was rising, I made sure my pizza stone was in the oven preheating at 500 degrees.  I let it heat for one hour, which gave me more than enough time to prep the toppings which included:

2 small, firm tomatoes - sliced thinly
3 cups arugula, cleaned, de-stemmed and shredded
3 garlic cloves, sauteed in some pesto I had in the fridge thinned out with some added olive oil
A small handful of turkey pepperoni slices - about 20 - sliced
3 Large Green Onions, sliced  - about 3 tablespoons
Mozzarella and Parmesan Cheese - Shredded - No measurements here, just enough to look "right" 

I rolled out the dough on a floured counter and then topped with one tomato each, and approximately one half of all other toppings.  First, I brushed the pesto on the dough and then topped it with the tomatoes, arugula, scallions, turkey pepperoni and cheeses.  


After topping, the pizzas each went into the oven for 8 minutes until the dough begins to tan and the cheese melts and begins to brown as well.